CYANOTYPE
MATERIALS LIST
This is an ongoing list of suggested materials, products, and ideas, that I will continue to update. This is for reference and not everything is required for a workshop. I have tried to include products for varying levels and budgets. Consider your own goals, workflow, and space. Please share anything useful you come across that you think I should add.
ADDITIONAL RECOMMENDATIONS
BOOKS LIST
Additional Articles and Resources
Contemporary Practices in Alternative Process Photography book series
The Book of Alternative Photographic Processes
By Christopher James
The cyanotype chapter is available to download: https://christopherjames-studio.com/sample-chapters
Mike Ware technical articles:
http://www.mikeware.co.uk/mikeware/New_Cyanotype_Process.html
Alternative Process “cheat sheets”
https://www.alternativeprocesses.org/ap-cheat-sheets
Alternative Photography Book List
SAFETY
Safety Information
MSDS Sheets:
Jaquard - Cyanotype
Be sure to wear gloves and eye protection when handling chemicals. Keep containers and mixing dishes that are dedicated to art/photography and do not reuse them for food once they have been used for photo chemicals.
Be aware that cyanotype chemicals may stain clothing!
CHEMICAL SUPPLIERS
Please let me know of any reliable international photo chemical suppliers I have not listed!
Dilution calculator:
https://www.alternativephotography.com/calculator-dilute-a-dilution/
PAPER

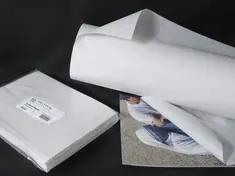
Hot Press vs. Cold Press: Most people prefer the smoother hot press surface for cyanotype. Either cold press or hot press watercolor paper will work, cold press has a rougher texture.
Paper weight (thickness) is measured in grams per square meter (gsm or g/m²). Some high-end papers are offered in light and heavy-weight options.
Examples of paper weight:
Tracing paper 30-60 gsm
Sketchbook paper 68 gsm
Office printer/copier paper around 75 gsm
Drawing paper around 100-130 gsm
Postcards & Business cards 250-400
Watercolor paper 300 gsm
Long paper list: https://www.alternativephotography.com/big-paper-survey-results/
Alternative Photography - Massive Paper Chart (scroll down for free version)
Information on paper buffering:
https://www.alternativephotography.com/paper-basics-buffering/
Budget Papers - great for experimenting
Canson XL Watercolor 300 gsm - Strong paper with watercolor texture, deep blues.
Canson Mix Media 98 gsm - Lightweight - not as dark blue.
Strathmore Bristol 300 - Strong very smooth paper, but can be uneven.
Stonehenge 250gsm - some modeling texture
High-end Papers - for the best results
Arches Platine Lightweight 145 gsm - Lightweight, fast exposure with wide tonal range.
Arches Platine Heavy 310 gsm (naturally wide tonal range)
*Large sheets of Arches paper have a watermark to avoid
Hahnemuhle Platinum Rag 310 gsm (request careful packaging if buying from B&H)
Berger COT (160 or 320 gsm)
Legion Revere Platinum 320 gsm
Paper Suppliers
DIGITAL NEGATIVE
Basic Digital Negative Generator: https://www.jacquardcyanotype.com/
Quickly turn an image into a negative without additional editing or curves.
Digital Negative Transparency Materials
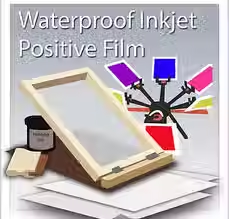
The "Waterproof Positive Film for Silk Screen" product is not noticeably different from the one sold for alternative processes and works well for digital negatives. Neither is not functionally waterproof - but the ink does not run.
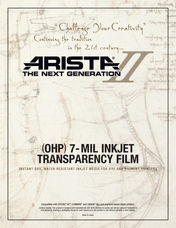
Pictorico Pro Ultra Premium OHP Transparency Film
Highest quality transparency. It has a slightly denser emulsion which could produce slightly longer exposure times.
*Buy the transparency/clear product not their “white film”
There have been stocking issues lately so stock up if you are working on a cohesive project.
Fixxons vs. Pictorico analysis https://www.youtube.com/watch?v=7fzAOhTls_o
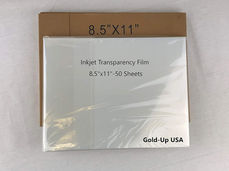
Inkjet Transparency for Silkscreen
Another option is to try a different brand of inkjet-coated material designed for silkscreen. Often the quality is good and you can purchase it in smaller quantities and various sizes.
Do new exposure tests when changing brands!
EXPOSURE
Sunlight Exposure
Here is a list of other artists' cyanotype exposure times all over the world at different times of the year.
www.alternativephotography.com/the-big-cyanotype-exposure-survey-results/
Many weather apps provide live UV Index ratings. The scale can be small without much precision but it gives you a framework.
Artificial UV Lights
Exposure lights for homemade boxes/setups must be UV lights.The wavelength is important; the best range for alternative processes is around 365 nm to 395 nm, and efficiency drops as it gets closer to 400 nm. 365 nm lights will be faster but are generally more expensive.
More information on UV wavelengths:
www.waveformlighting.com/tech/what-is-the-difference-between-365-nm-and-395
UV lights and UV boxes designed for screen printing work well. Some have lights on the bottom, and the print is placed face-down on glass. This system does not work for photograms of 3D objects. You want to ensure the light evenly exposes the full area of the largest print you intend to make.
Below are lights that will need a box or curtain of some sort.
Exposure Units
Metal boxes are often used (not required) because they become a heat-sink for the lights which can get hot. An exposure unit box or casing can be made out of something as simple as a black plastic tote/bin. The lights can be attached to the lid or flip it over and connect the lights to the bottom. As little as 4 in from lights to paper - this may take some trial and error depending on the lights.
Building a UV exposure box articles:

This is what I used for my homemade exposure unit:
Super Bright 60 Watts UV Black Light LED Strip (maybe with another set of similar lights?)
Cyanotype exposures are 40+ mins
9 inches from lights to contact frame glass (this could be a lot closer, which could make it faster)
To make this box I laser-cut the sides of the box and connected them with Unistrut. I had extra help spicing and reconnecting the LED strips to get them to lay flat like this. The Barrina lights would be easier to connect.
I plugged the lights into a standard darkroom timer.
UV Boxes
DIY UV Box Ideas
UV lights can get hot so be aware when using a plastic or flammable carrier. It is also dangerous to look at or be exposed to UV light, so it is necessary to have a protective box or curtain around the light when it is on. It can be helpful to run a light through a darkroom timer or smart plug in order to control exposure times.
Integrating Light Meter
One alternative to a UV light or exposure unit is a meter that measures accumulated UV light as opposed to the amount in a single moment. This makes measuring sunlight exposure very easy and consistent. The problem is that there is currently no perfect product.
Lightmeasure used to make one but they are no longer selling their devices.
A possible option (I have not tried) - shipping from Switzerland
*requires a power source - no batteries
https://www.ianleake.com/collections/light-counter-system?page=1
“While I use my devices for platinum printing, I have many customers using them to control exposures for cyanotype, gum, carbon, and even silver gelatin prints; both darkroom exposures and sun printing. Unfortunately, right now I have a component supply problem, so have none in stock. I hope to resolve this in a couple of months.” - 9/23/2023
“The basic system is a UV sensor (59 CHF) and a light integrator (339 CHF). About half my customers also buy a power controller, because this allows the light integrator to switch your light source on and off (depending on the light source for compatibility).”
If you or someone you know is very technically minded you could build one…
https://apenasimagens.com/en/solar-uv-exposure-meter-complete-project/
https://www.youtube.com/watch?v=42rwjuU4VrQ
DARKROOM SETUP


DIY Upgrade
I stacked two old sweater drying racks and replaced the corner brackets with wood posts. I attached the posts to a wooden base and added wooden pieces to hold them in place at the top. Knowing it would be in the corner against a wall I covered the back sides in cardboard and attached the side and front with thick fabric. I left the front loose so that I can have it open or shut. I might add velcro or magnets on the side that opens…
The biggest issue I had creating this is that these are 28” wide and most boards at the hardware store are 24”.
FRAMING & STORAGE
It is a good practice to use archival materials when storing and framing cyanotype prints.
Storage
Cyanotypes are sensitive to “buffering” agents that are used in many archival materials. Buffered papers contain calcium carbonate. For long-term storage un-buffered archival tissue is the best thing to use between or against the surface of cyanotype prints.
Ultraviolet (UV)-protected glass
UV can damage your art as it’s transmitted through the glass, to guard against this some glass coating reflects or absorbs the UV spectrum. Some use organic UV absorbers, which are added to a silica-based coating to create an absorbing layer on one side of the glass. This coating can block anywhere from 92% to 99% of the UV radiation. The drawback to these filters is they create a slight warming effect on the color of the artwork. This will be especially true with coatings that block 98% or more UV radiation.
Pros: Protects against fading
Cons: Increased cost, slight warming effect of the artwork’s color
Other glass coatings (not required)
Non-Glare Glass
Non-glare picture frame glass has an etched surface that helps to disperse the light and reduce reflections. The etched surface has the drawback of slightly reducing the sharpness. For instance, it might be more difficult to make out individual hairs on a portrait of a person for example. For this type of glass to work properly, it has to be close to the artwork so it can’t be used in picture frames with large spacers or in a shadow box frame.
Pros: Least expensive reflection control glass
Cons: Slight loss of sharpness, cant be used in a shadow box frame
Anti-Reflective Glass
This type of glass has a special type of coating to greatly reduce reflections very similar to that used on glasses and sunglasses you wear.
Pros: Virtually eliminates reflections
Cons: Most expensive type of refection control glass
https://tru-vue.com/products/ (a chart with types of glass and plexi)
Mat Board
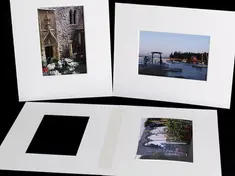
As we’ve seen while toning, cyanotype is very sensitive to acids. For any long-term presentation framing it is important to use an acid-free mat board and ideally backing board. For the backing board, you can use an acid-free foam board or a piece of acid-free mat board. If the mat board as a backing board is not rigid enough you may want an additional foam board behind it which does not have to be acid free.
Mat Board Options
Museum Board - 100% Cotton:
Made from cotton pulp, museum board is the most chemically stable archival paper product available.
Conservation Board:
Conservation board is manufactured from purified wood fiber, which is still archivally safe but more economical.
4 ply is the standard mat board thickness. 8-ply is extra thick. I don’t recommend 2 ply as it is very thin and may not be rigid enough.
INKJET PRINTERS
Here is an article comparing several printers for printing digital negatives.
https://toptenreviewed.com/best-printers-for-digital-negatives/
Canon Pro 1000 vs. Epson P900 (according to the internet)
Canon Pro 1000
-
Has suction paper feed (reduces pizza wheel scratches on negatives).
-
Canon has replaceable print heads so if one gets clogged it is an easier fix.
-
Ink may be less expensive.
Epson P900
-
Quadtone Rip (a complicated system for making digital negative curves) may only work on Epson printers.
-
Has smaller dots and a “much higher printing resolution”
-
More prone to clogging if not used regularly (that may be less of an issue with newer models).
Trouble Shooting:
Every printer will have its own quirks and issues when it comes to printing digital negatives.
Head strike - If the print head collides with the paper it can leave a big ink mark. This is most common on the edge of the paper but can happen anywhere, especially with curled paper or transparency.
-Try increasing the “platen gap” - instructions for this will be printer specific.
Epson: File > Print > Print Settings > Advanced Media Control
Banding - horizontal stripes in the print, as if a line of printing was skipped.
-
First, try printing a nozzle check pattern on a piece of clean scrap paper in order to see if any inks are clogged.
-
Turn off “high speed”
For "pizza wheels" try using a front tray feeder or "Fine Art Paper" feeder.
FAQ
Why is the blue cyanotype bleeding into the white areas of the print?
It seems like the best solution for bleeding shadows (blue running into white areas) is to reduce the amount of FAC in the mixture to 10-15%. The problem with this is that the lower the FAC the lighter the darkest value will be, so you might not be able to get as dark of a shadow with a 10% mixture. It may also reduce the exposure speed a bit.
I would start by mixing Solution A: 15g Ferric Ammonium Citrate to 100ml and keep Solution B: Potassium Ferricyanide the same. This will help reduce the blue bleeding as well as minimize streaking and increase the tonal range.


